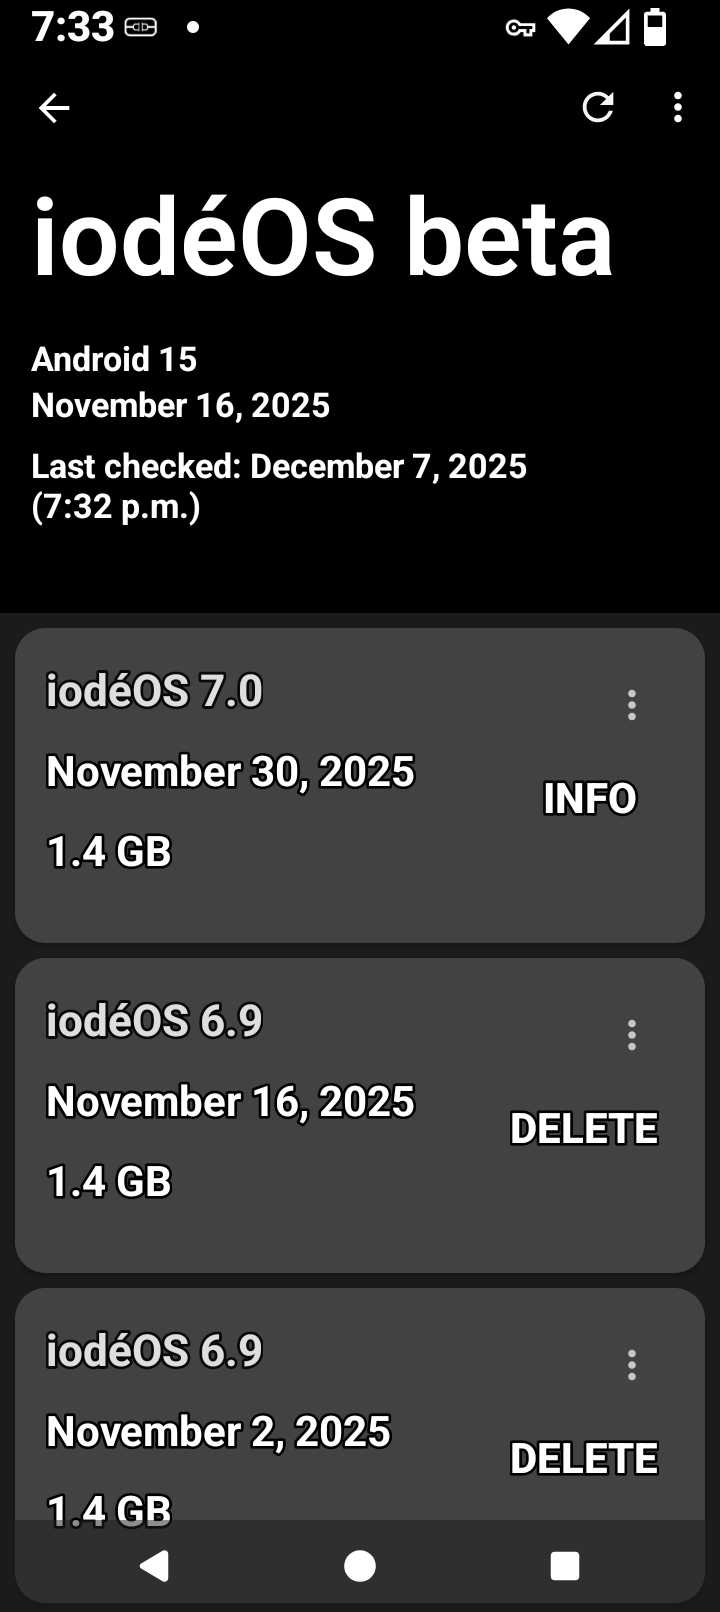
Your phone will soon receive an upgrade to version 7.
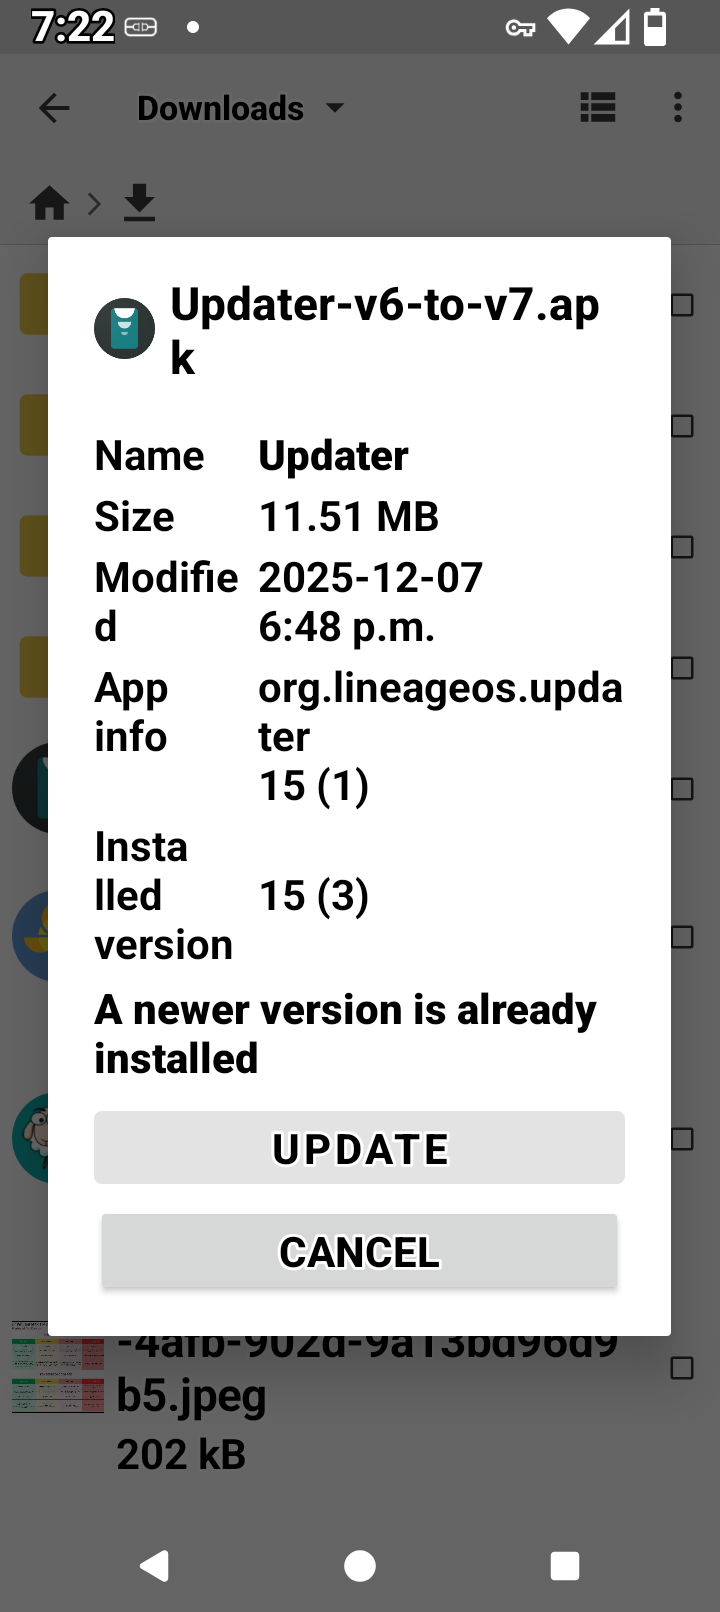
Exceptionally, in order to install it, you will need to install a temporary update of the ‘Updater’ application if your current system version is 6. After installing iodéOS 7.0, you will need to uninstall the update of this application. If you don’t install that update, a popup will appear, stating that the update is not possible and redirecting to a broken LineageOS wiki page.
2. Install the system upgrade when it becomes available. Restart the device and check that you have successfully upgraded to version 7.
3. Uninstall the update of the ‘Updater’ application: long press on its icon, select ‘About app’, then the three-dot menu in the top right corner, and finally ‘Uninstall updates’.
Additionally : iodéOS system upgrades generally do not need such kind of manipulation. This is due to a change in the LineageOS updater blocking transitions of major updates until a system property is set, that we saw too late.
And by the way, another solution exists, instead of installing the v6 to v7 updater : setting that property to true, by issuing the command adb shell setprop lineage.updater.allow_major_upgrades true.
is used to enable major system upgrades on devices running LineageOS. This command modifies a system property that allows the installation of significant updates without the usual restrictions.
Usage Instructions
Requirements
ADB Installed: Ensure you have ADB (Android Debug Bridge) installed on your computer.
USB Debugging: Enable USB debugging on your Android device.
Steps to Execute
Connect Device: Connect your Android device to your computer via USB.

Open Command Line: Launch a command prompt or terminal window on your computer.

Enter Command: Type the following command and press Enter:
Temporary Solution: This command is a workaround for upgrading from older versions of LineageOS to newer ones, particularly when the standard updater is blocked.

Uninstall Updater: After successfully upgrading, you may need to uninstall any temporary updater applications as per the upgrade instructions.

Alternative Method: If you prefer not to use ADB, you can install a temporary update of the Updater application, but this may involve additional steps.
This command is particularly useful for users looking to upgrade to iodéOS 7.0 or similar major updates without encountering issues.
I realized I typed too fast and edited my second post : it’s adb shell setprop ... instead of adb setprop ..., which AI apparently did not see. Maybe AI is not ready to completely replace humans yet
It just drew the information from here, it doesn’t attempt to correct anything but the information on connecting the phone was good, I never use AI except for upscaling or fixing photos but most of the times its automatic answers on duckduckgo are very good and I don’t need to go through many links to try to find what I’m looking for.
Update the updater with the temporary updater update, then update. Then uninstall the temporary update from the updater…. Just like the time I learned to speak Japanese, very easy! LOL.
I followed these steps and was successful but then my phone disconnected from AT&T. And now it will not attach and can only make emergency calls. When I turn SIM off and back on it connects but fails to attach. This upgrade has broken my phone which was working fine from day one! Something about iode 7.0 and the updater breaks AT&T network connection, please let me know a solution as it was working fine in 6.9.
“I did the iode 7 update and it killed my network connection. Cannot connect to ATT now. Has anyone else experienced this? UPDATE: ATT Nextgen APN did not have “default” selected as an APN type after the update to iode 7. Added “default” as a selected type in the profile, and it resolved.”